11 Temmuz 2012 Çarşamba
10 Temmuz 2012 Salı
9 Temmuz 2012 Pazartesi
Brodard Vietnamese, Garden Grove, CA
To contact us Click HERE
 Brodard's Vietnamese Restaurant
I went to Brodard's Vietnamese Restaurant in Garden Grove, CA on Friday. The American Library Association's (ALA) annual conference is in town at the Anaheim Convention Center. Some 10,000+ librarians come to town with lots of cardigans.
We went to Brodard's Vietnamese in nearby Garden Grove. If you come to visit Disneyland or have a conference in Anaheim, you really need make your way to Little Saigon in the Santa Ana / Garden Grove / Westminster area of Orange County for something other than conference food. It was our first time at Brodard's. Reviewers either love or hate the sauce that accompanies their famous spring rolls. The spring rolls were very good and very tightly sealed (when I make them they are a floppy mess), but I found the sauce too sweet and used the basic fish sauce instead.
The service gets pretty ripped in Yelp, but I felt it was pretty typical of a fast-paced Vietnamese restaurant. We ordered, got the food and never saw the waiter again. If you want something, just raise your hand and get someone's attention. We talked for a long time and nearly closed down the place so it was great for us! :)
Brodard
Vietnamese Restaurant (Cafe next door)
Inside the Mall of Fortune
9892 Westminster Ave
Garden Grove, CA 92844
Yelp
Gastromony post (Thanks Cathy! Your post really helped us pick dishes!)
Brodard's Vietnamese RestaurantI went to Brodard's Vietnamese Restaurant in Garden Grove, CA on Friday. The American Library Association's (ALA) annual conference is in town at the Anaheim Convention Center. Some 10,000+ librarians come to town with lots of cardigans.
We went to Brodard's Vietnamese in nearby Garden Grove. If you come to visit Disneyland or have a conference in Anaheim, you really need make your way to Little Saigon in the Santa Ana / Garden Grove / Westminster area of Orange County for something other than conference food. It was our first time at Brodard's. Reviewers either love or hate the sauce that accompanies their famous spring rolls. The spring rolls were very good and very tightly sealed (when I make them they are a floppy mess), but I found the sauce too sweet and used the basic fish sauce instead.
The service gets pretty ripped in Yelp, but I felt it was pretty typical of a fast-paced Vietnamese restaurant. We ordered, got the food and never saw the waiter again. If you want something, just raise your hand and get someone's attention. We talked for a long time and nearly closed down the place so it was great for us! :)
Brodard
Vietnamese Restaurant (Cafe next door)
Inside the Mall of Fortune
9892 Westminster Ave
Garden Grove, CA 92844
Yelp
Gastromony post (Thanks Cathy! Your post really helped us pick dishes!)
Blueberry Buckle - King Arthur Flour
To contact us Click HERE
 Blueberry Buckle
Oh man, the buckle is one of the most awesome baked good ever. It's a fruity coffee cakey delight. I've made a nectarine buckle, lemon blueberry buckle, peach blueberry buckle - all delicious.This time, I made King Arthur's Blueberry Buckle.
 I bought a big box of fresh blueberries and knew I had to bake something with them! Although the recipe doesn't call for this, I recommend adding 75% of the blueberries to the batter. Spread the batter into the pan, and then sprinkle the remaining 25% blueberries on top. Follow that with the crumb topping. Leaving some blueberries on top guarantee that the little blueberries don't all fall into the cake.
 It was really early in the morning when I made this and forgot to add the lemon zest! Be sure you add that for a fresh taste.
 Um, nothing like warm cake for breakfast!
 I dropped this box off for my former co-workers. I got a message back from one of them saying they did their buckle dance. :) That's why baking for others is just awesome.
King Arthur Flour: The Baker's Companion
Blueberry Buckle (page 132-133)
Topping
3/4 cup (5 1/2 ounces) sugar
3/4 cup (3 ounces) flour
1 teaspoon cinnamon
1/2 teaspoon salt
5 1/3 tablespoons (2/3 stick) butter (I only used 1/2 stick of butter because I didn't want a leftover 1/3 stick. The batter uses 1/2 stick so I used a total of 1 stick of butter for the whole cake. It turned out fine with the 1/2 stick in the topping).
2 to 3 teaspoons lemon zest, or 1/8 teaspoon lemon oil (I skipped this part because I forgot to include it!)
Batter
3/4 cup (5 1/4 ounces) sugar
1/4 cup (1/2 stick, 2 ounces) butter
1 large egg
1/2 cup (4 ounces) milk (I used low-fat milk)
2 cups (8 1/2 ounces) flour
2 teaspoons baking powder
1/2 teaspoon salt
1 teaspoon vanilla
2 cups blueberries (fresh or if frozen, unthawed) (I used fresh blueberries)
1. Preheat oven to 375°F. Prep (grease and flour) a 9-inch square or 9-inch round pan. I like to line the pan with a parchment paper sling for easy removal.
2. Topping: Mix the sugar, flour and cinnamon, and lemon zest in a small bowl. Cut or rub in the butter with the side of a fork, two knives or your finger tips until it reaches a crumbly state. Set aside.
3. Batter: Whisk together the flour, baking powder and salt together in a mixing bowl. Set aside. In a stand mixer with paddle attachment, cream together the sugar and butter. Then add the egg and vanilla. Alternately add the milk and the flour mixture to the creamed mixture, ending with flour. Do not overmix. Fold in the blueberries.
4. Assemble: Pour batter into cake pan. Sprinkle the topping over the batter and bake for 40-50 minutes or until a cake tester or knife comes out clean.
5. Let the buckle cool for 10 minutes. Loosen the sides with a knife or spatula. Cool on a wire rack.
King Arthur has an online Blueberry Buckle but it is a little different than the one in the printed King Arthur Flour cookbook. Here it is though: http://www.kingarthurflour.com/recipes/blueberry-buckle-coffee-cake-recipe
Blueberry BuckleOh man, the buckle is one of the most awesome baked good ever. It's a fruity coffee cakey delight. I've made a nectarine buckle, lemon blueberry buckle, peach blueberry buckle - all delicious.This time, I made King Arthur's Blueberry Buckle.
I bought a big box of fresh blueberries and knew I had to bake something with them! Although the recipe doesn't call for this, I recommend adding 75% of the blueberries to the batter. Spread the batter into the pan, and then sprinkle the remaining 25% blueberries on top. Follow that with the crumb topping. Leaving some blueberries on top guarantee that the little blueberries don't all fall into the cake.It was really early in the morning when I made this and forgot to add the lemon zest! Be sure you add that for a fresh taste.Um, nothing like warm cake for breakfast!I dropped this box off for my former co-workers. I got a message back from one of them saying they did their buckle dance. :) That's why baking for others is just awesome.King Arthur Flour: The Baker's Companion
Blueberry Buckle (page 132-133)
Topping
3/4 cup (5 1/2 ounces) sugar
3/4 cup (3 ounces) flour
1 teaspoon cinnamon
1/2 teaspoon salt
5 1/3 tablespoons (2/3 stick) butter (I only used 1/2 stick of butter because I didn't want a leftover 1/3 stick. The batter uses 1/2 stick so I used a total of 1 stick of butter for the whole cake. It turned out fine with the 1/2 stick in the topping).
2 to 3 teaspoons lemon zest, or 1/8 teaspoon lemon oil (I skipped this part because I forgot to include it!)
Batter
3/4 cup (5 1/4 ounces) sugar
1/4 cup (1/2 stick, 2 ounces) butter
1 large egg
1/2 cup (4 ounces) milk (I used low-fat milk)
2 cups (8 1/2 ounces) flour
2 teaspoons baking powder
1/2 teaspoon salt
1 teaspoon vanilla
2 cups blueberries (fresh or if frozen, unthawed) (I used fresh blueberries)
1. Preheat oven to 375°F. Prep (grease and flour) a 9-inch square or 9-inch round pan. I like to line the pan with a parchment paper sling for easy removal.
2. Topping: Mix the sugar, flour and cinnamon, and lemon zest in a small bowl. Cut or rub in the butter with the side of a fork, two knives or your finger tips until it reaches a crumbly state. Set aside.
3. Batter: Whisk together the flour, baking powder and salt together in a mixing bowl. Set aside. In a stand mixer with paddle attachment, cream together the sugar and butter. Then add the egg and vanilla. Alternately add the milk and the flour mixture to the creamed mixture, ending with flour. Do not overmix. Fold in the blueberries.
4. Assemble: Pour batter into cake pan. Sprinkle the topping over the batter and bake for 40-50 minutes or until a cake tester or knife comes out clean.
5. Let the buckle cool for 10 minutes. Loosen the sides with a knife or spatula. Cool on a wire rack.
King Arthur has an online Blueberry Buckle but it is a little different than the one in the printed King Arthur Flour cookbook. Here it is though: http://www.kingarthurflour.com/recipes/blueberry-buckle-coffee-cake-recipe
Strawberry Shortcake Cookies - Martha Stewart
To contact us Click HERE
 Strawberry Shortcake Cookies
It's now the season where you can get a flat of strawberries at the farmer's market for $8-10. Awesome. I usually pick up a three pack every week. Love strawberries in yogurt, just plain and in dessert. These are Strawberry Shortcake Cookies from Martha Stewart.
 These cookies are supposed to be like a traveling strawberry shortcake. Um, I'd rather have a real strawberry shortcake. They were okay, but they didn't rock my world.
If you want to bake with strawberries, I would go for Joy the Baker's Strawberry Upside Down cake or Martha Stewart's Strawberry Cake in a pie pan.

Recipe:
From Martha Stewart
Martha Stewart Living, June 2009
12 ounces strawberries, hulled and cut into 1/4-inch dice (2 cups)
1 teaspoon fresh lemon juice
1/2 cup plus 1 tablespoon granulated sugar, divided
2 cups all-purpose flour
2 teaspoons baking powder
1/2 teaspoon kosher salt
3 ounces (6 tablespoons, 3/4 of a stick) cold unsalted butter, cut into small pieces
2/3 cup heavy cream
Sanding sugar, for sprinkling
Preheat oven to 375 degrees F.
Combine the cut strawberries, lemon juice, and 2 tablespoons granulated sugar.
Whisk together flour, baking powder, salt, and remaining 7 tablespoons granulated sugar in a large bowl.
Cut in the butter with a pastry cutter, or rub in with your fingers, until mixture resembles coarse crumbs.
Stir in cream until dough starts to come together, then stir in strawberry mixture.
Drop dough onto baking sheets lined with parchment (I used a small cookie scoop).
Sprinkle with sanding sugar, and bake until golden brown, about 20-25 minutes.
Transfer to a wire rack, and let cool.
These cookies don't keep. Cookies are best served immediately, but can be stored in an airtight container at room temperature for up to 1 day.
Strawberry Shortcake CookiesIt's now the season where you can get a flat of strawberries at the farmer's market for $8-10. Awesome. I usually pick up a three pack every week. Love strawberries in yogurt, just plain and in dessert. These are Strawberry Shortcake Cookies from Martha Stewart.
These cookies are supposed to be like a traveling strawberry shortcake. Um, I'd rather have a real strawberry shortcake. They were okay, but they didn't rock my world.If you want to bake with strawberries, I would go for Joy the Baker's Strawberry Upside Down cake or Martha Stewart's Strawberry Cake in a pie pan.
Recipe:
From Martha Stewart
Martha Stewart Living, June 2009
12 ounces strawberries, hulled and cut into 1/4-inch dice (2 cups)
1 teaspoon fresh lemon juice
1/2 cup plus 1 tablespoon granulated sugar, divided
2 cups all-purpose flour
2 teaspoons baking powder
1/2 teaspoon kosher salt
3 ounces (6 tablespoons, 3/4 of a stick) cold unsalted butter, cut into small pieces
2/3 cup heavy cream
Sanding sugar, for sprinkling
Preheat oven to 375 degrees F.
Combine the cut strawberries, lemon juice, and 2 tablespoons granulated sugar.
Whisk together flour, baking powder, salt, and remaining 7 tablespoons granulated sugar in a large bowl.
Cut in the butter with a pastry cutter, or rub in with your fingers, until mixture resembles coarse crumbs.
Stir in cream until dough starts to come together, then stir in strawberry mixture.
Drop dough onto baking sheets lined with parchment (I used a small cookie scoop).
Sprinkle with sanding sugar, and bake until golden brown, about 20-25 minutes.
Transfer to a wire rack, and let cool.
These cookies don't keep. Cookies are best served immediately, but can be stored in an airtight container at room temperature for up to 1 day.
Nectarine Buttermilk Upside-Down Cake - Bi-Rite Creamery
To contact us Click HERE
 Nectarine Buttermilk Upside-Down Cake
Oh stone fruit. You rock my world.
Have you been to Bi-Rite Creamery in San Francisco? Oh, some of the best ice cream around! They have two books in print. I picked up Bi-Rite Market's Eat Good Food: A Grocer's Guide to Shopping, Cooking & Creating Community Through Food at the library. I've never been to the market, but it is on my list for my next visit.
They also have this ice cream cookbook - can't wait to get this one! Sweet Cream and Sugar Cones: 90 Recipes for Making Your Own Ice Cream and Frozen Treats from Bi-Rite Creamery
 I used Mango Nectarines to make this cake. I get them from Ken's Top Notch Produce - he's in many Southern California farmer's market. These nectarines are the best...I mean, the BEST. I load up on them every week during the summer.

Melt some butter and brown sugar and pour into the bottom of a 9" x 3" pan. A scattering of sliced nectarines are placed on top. The simple buttermilk cake batter goes on top...and in about an hour, you have something yummy!
This recipe for Nectarine Buttermilk Upside-Down Cake is in the Market cookbook (page 147) and you can use pears, apples or other stone fruits.
 Recipe:
Nectarine Buttermilk Upside-Down Cake
Adapted from: Bi-Rite Market's Eat Good Food: A Grocer's Guide to Shopping, Cooking & Creating Community Through Food
Find it on Amazon or in your library (WorldCat listing)
Topping (placed on the bottom of the pan):
6 Tablespoons or 3 ounces or 3/4 of a stick of butter
3/4 c (150 grams) light brown sugar
4 medium ripe nectarines, cut into 1/2" slices (I used three large mango nectarines)
Melt the butter and the brown sugar. Stir until smooth. Place in the bottom of a 9" x 3" round pan.
Arrange fruit on the bottom in a pretty pattern.
Batter:
6 Tablespoons or 3 ounces or 3/4 of a stick of butter, softened
3/4 cup (150 grams) granulated sugar
1 1/2 cup (6 3/4 ounce) all-purpose flour
2 teaspoon baking powder
1/2 teaspoon kosher slat
3 large eggs
1/2 cup buttermilk
2 teaspoon vanilla
Mix together the flour, powder and salt in a bowl. Set aside.
Cream butter and sugar in a mixer with paddle attachment until fluffy, about 2-3 minutes.
Add eggs, one at a time, and beat well between each addition.
On slow, alternately add 1/2 the flour, followed by the milk, then remaining of the flour mixture. Add the vanilla. Do not overbeat.
Spoon batter over the fruit mixture.
Bake in the center oven for 50-60 minutes, until a toothpick comes out clean.
Let rest on a wire rack for 30 minutes and then invert onto a serving platter.


Nectarine Buttermilk Upside-Down Cake
Oh stone fruit. You rock my world.
Have you been to Bi-Rite Creamery in San Francisco? Oh, some of the best ice cream around! They have two books in print. I picked up Bi-Rite Market's Eat Good Food: A Grocer's Guide to Shopping, Cooking & Creating Community Through Food
They also have this ice cream cookbook - can't wait to get this one! Sweet Cream and Sugar Cones: 90 Recipes for Making Your Own Ice Cream and Frozen Treats from Bi-Rite Creamery
I used Mango Nectarines to make this cake. I get them from Ken's Top Notch Produce - he's in many Southern California farmer's market. These nectarines are the best...I mean, the BEST. I load up on them every week during the summer.Melt some butter and brown sugar and pour into the bottom of a 9" x 3" pan. A scattering of sliced nectarines are placed on top. The simple buttermilk cake batter goes on top...and in about an hour, you have something yummy!
This recipe for Nectarine Buttermilk Upside-Down Cake is in the Market cookbook (page 147) and you can use pears, apples or other stone fruits.
Recipe:Nectarine Buttermilk Upside-Down Cake
Adapted from: Bi-Rite Market's Eat Good Food: A Grocer's Guide to Shopping, Cooking & Creating Community Through Food
Find it on Amazon or in your library (WorldCat listing)
Topping (placed on the bottom of the pan):
6 Tablespoons or 3 ounces or 3/4 of a stick of butter
3/4 c (150 grams) light brown sugar
4 medium ripe nectarines, cut into 1/2" slices (I used three large mango nectarines)
Melt the butter and the brown sugar. Stir until smooth. Place in the bottom of a 9" x 3" round pan.
Arrange fruit on the bottom in a pretty pattern.
Batter:
6 Tablespoons or 3 ounces or 3/4 of a stick of butter, softened
3/4 cup (150 grams) granulated sugar
1 1/2 cup (6 3/4 ounce) all-purpose flour
2 teaspoon baking powder
1/2 teaspoon kosher slat
3 large eggs
1/2 cup buttermilk
2 teaspoon vanilla
Mix together the flour, powder and salt in a bowl. Set aside.
Cream butter and sugar in a mixer with paddle attachment until fluffy, about 2-3 minutes.
Add eggs, one at a time, and beat well between each addition.
On slow, alternately add 1/2 the flour, followed by the milk, then remaining of the flour mixture. Add the vanilla. Do not overbeat.
Spoon batter over the fruit mixture.
Bake in the center oven for 50-60 minutes, until a toothpick comes out clean.
Let rest on a wire rack for 30 minutes and then invert onto a serving platter.


Meyer Lemon Muffins - Los Angeles Times
To contact us Click HERE
 Meyer Lemon Muffins from the Los Angeles Times
My dad has a meyer lemon tree and I always have a few lemons around. I know...I'm totally lucky! If you happen to have access to some meyer lemons, try this muffin!
 This recipe comes from the Los Angeles Times Food Section... my favorite reading of the week. I changed up the topping a bit, but hope to try the original soon. The original has a cinnamon-sugar mixture with a thin slice of lemon on top.
 You take two Meyer Lemons and process them...skins and all. I don't think you should do this with a regular lemon. Meyer lemons have thinner skin and are sweeter than regular lemons. The muffins don't rise very much.

Meyer Lemon Muffins
Los Angeles Times
I adapted the Meyer Lemon Muffins that appeared in the Los Angeles Times, but I changed up the topping. I skipped the cinnamon, sugar, thin slice of lemon topping for a powdered sugar/lemon glaze.
2 cups flour
1 cup sugar
1 teaspoon baking soda
1 teaspoon salt
2 Meyer lemons
2 eggs
1 cup milk
1/2 cup butter, melted
Glaze:
1 1/2 cups powdered sugar
Lemon juice
1. Preheat oven to 400 degrees. Prep muffin tins with liners or Pam with Flour spray.
2. Whisk together the flour, sugar, baking soda and salt in a large mixing bowl. Set aside.
3. Cut two of the lemons into 1-inch pieces. Remove the seeds. Put them in a blender or food processor and pulse until the lemon is finely chopped. (I would only make this recipe with Meyer lemons, not regular lemons.)
4. In a small bowl, lightly beat the eggs. Add the milk, butter and chopped lemon mixture, and stir to combine.
5. Make a well in the center of the dry ingredients and pour in the lemon mixture. Stir just until all ingredients are moistened.
6. Spoon the batter into muffin pans, making about 18 muffins.
7. Bake until toothpick comes out clean, about 20 minutes.
8. Remove from pan and allow to cool on a wire rack.
9. Glaze: Combine powdered sugar with enough lemon juice to make a glaze. Pour over the muffins.
Note: The LA Times recipe has a cinnamon, sugar, lemon slice topping. Please see the recipe for those instructions.
Meyer Lemon Muffins from the Los Angeles TimesMy dad has a meyer lemon tree and I always have a few lemons around. I know...I'm totally lucky! If you happen to have access to some meyer lemons, try this muffin!
This recipe comes from the Los Angeles Times Food Section... my favorite reading of the week. I changed up the topping a bit, but hope to try the original soon. The original has a cinnamon-sugar mixture with a thin slice of lemon on top.You take two Meyer Lemons and process them...skins and all. I don't think you should do this with a regular lemon. Meyer lemons have thinner skin and are sweeter than regular lemons. The muffins don't rise very much.Meyer Lemon Muffins
Los Angeles Times
I adapted the Meyer Lemon Muffins that appeared in the Los Angeles Times, but I changed up the topping. I skipped the cinnamon, sugar, thin slice of lemon topping for a powdered sugar/lemon glaze.
2 cups flour
1 cup sugar
1 teaspoon baking soda
1 teaspoon salt
2 Meyer lemons
2 eggs
1 cup milk
1/2 cup butter, melted
Glaze:
1 1/2 cups powdered sugar
Lemon juice
1. Preheat oven to 400 degrees. Prep muffin tins with liners or Pam with Flour spray.
2. Whisk together the flour, sugar, baking soda and salt in a large mixing bowl. Set aside.
3. Cut two of the lemons into 1-inch pieces. Remove the seeds. Put them in a blender or food processor and pulse until the lemon is finely chopped. (I would only make this recipe with Meyer lemons, not regular lemons.)
4. In a small bowl, lightly beat the eggs. Add the milk, butter and chopped lemon mixture, and stir to combine.
5. Make a well in the center of the dry ingredients and pour in the lemon mixture. Stir just until all ingredients are moistened.
6. Spoon the batter into muffin pans, making about 18 muffins.
7. Bake until toothpick comes out clean, about 20 minutes.
8. Remove from pan and allow to cool on a wire rack.
9. Glaze: Combine powdered sugar with enough lemon juice to make a glaze. Pour over the muffins.
Note: The LA Times recipe has a cinnamon, sugar, lemon slice topping. Please see the recipe for those instructions.
8 Temmuz 2012 Pazar
Black and White Coconut Cookies & Giveaway Winner!
To contact us Click HERE

These cookies are loaded with white and dark chocolate, in addition to a good amount of coconut. I was inspired by my favorite Dark Chocolate Coconut Blondies. Chewy cookies with almost all of my favorite flavors, I've made these three times in the past month.
These were delicious warm from the oven and every bit as good two days later. I’m including directions for regular baking with AP flour, in addition to the Gluten Free version posted below. If you aren’t sure what to do with the leftover egg white, these Cinnamon Roasted Pecans are always a great idea.
Black and White Coconut Cookies – Gluten Free or Regular Flour recipesrecipe makes approximately 4 dozen medium size cookies
1 cup butter1 3/4 cups light brown sugar1 egg1 egg yolk2 teaspoons vanilla1 ¾ cups brown rice flour *½ cup tapioca starch *¼ cup potato starch *1 teaspoon xantham gum *1 cup old fashioned rolled oats (you will barely taste these in the finished cookies, but the oats add a great texture)1/2 teaspoon baking soda1/2 teaspoon kosher salt1/4 teaspoon cinnamon3/4 cup white chocolate chips3/4 cup semi-sweet chocolate chips1 cup coconut* If cooking a non-GF version, simply replace all items with an * with 2 1/2 cups of AP flour
In a large size saucepan, melt the butter over medium heat. Once the butter is melted, remove from the heat and add the sugar. Stir until the sugar is well-incorporated and mostly smooth. Let cool for a few minutes.
While the mixture is cooling, mix together the dry ingredients and set aside. Whisk together the egg, egg yolk and vanilla and then add to the sugar and butter mixture. Slowly add the dry ingredients in three stages and stir to combine. Add the chocolate chips and coconut and stir well to make sure everything is evenly distributed. Chill the mixture for at least one hour, prior to scooping the cookie dough.
Preheat the oven to 325 degrees. Scoop the dough unto a parchment or silpat lined baking sheet. (Place the dough back in the refrigerator in between batches.) Bake for 10-12 minutes , 11 minutes was perfect for me. Let cool for 1-2 minutes on the baking sheet and then remove to a wire rack. Enjoy!

Click here for printable recipe

The winner of the $43 gift card to Catching Fireflies is: Alicia! Congratulations, Alicia. I'll be in contact with you today. Thank you to everyone for entering the drawing!

ONE YEAR AGO TODAY: Breakfast Skillet with Potatoes, Peppers and Canadian Bacon
These cookies are loaded with white and dark chocolate, in addition to a good amount of coconut. I was inspired by my favorite Dark Chocolate Coconut Blondies. Chewy cookies with almost all of my favorite flavors, I've made these three times in the past month.
These were delicious warm from the oven and every bit as good two days later. I’m including directions for regular baking with AP flour, in addition to the Gluten Free version posted below. If you aren’t sure what to do with the leftover egg white, these Cinnamon Roasted Pecans are always a great idea.
Black and White Coconut Cookies – Gluten Free or Regular Flour recipesrecipe makes approximately 4 dozen medium size cookies
1 cup butter1 3/4 cups light brown sugar1 egg1 egg yolk2 teaspoons vanilla1 ¾ cups brown rice flour *½ cup tapioca starch *¼ cup potato starch *1 teaspoon xantham gum *1 cup old fashioned rolled oats (you will barely taste these in the finished cookies, but the oats add a great texture)1/2 teaspoon baking soda1/2 teaspoon kosher salt1/4 teaspoon cinnamon3/4 cup white chocolate chips3/4 cup semi-sweet chocolate chips1 cup coconut* If cooking a non-GF version, simply replace all items with an * with 2 1/2 cups of AP flour
In a large size saucepan, melt the butter over medium heat. Once the butter is melted, remove from the heat and add the sugar. Stir until the sugar is well-incorporated and mostly smooth. Let cool for a few minutes.
While the mixture is cooling, mix together the dry ingredients and set aside. Whisk together the egg, egg yolk and vanilla and then add to the sugar and butter mixture. Slowly add the dry ingredients in three stages and stir to combine. Add the chocolate chips and coconut and stir well to make sure everything is evenly distributed. Chill the mixture for at least one hour, prior to scooping the cookie dough.
Preheat the oven to 325 degrees. Scoop the dough unto a parchment or silpat lined baking sheet. (Place the dough back in the refrigerator in between batches.) Bake for 10-12 minutes , 11 minutes was perfect for me. Let cool for 1-2 minutes on the baking sheet and then remove to a wire rack. Enjoy!
Click here for printable recipe
The winner of the $43 gift card to Catching Fireflies is: Alicia! Congratulations, Alicia. I'll be in contact with you today. Thank you to everyone for entering the drawing!
ONE YEAR AGO TODAY: Breakfast Skillet with Potatoes, Peppers and Canadian Bacon
Potato, Red Pepper, Black and White Bean Hash
To contact us Click HERE
 Red potatoes seasoned with Mexican spices are roasted and then tossed with sauteed onions, peppers, black and white beans along with a handful of barely wilted warm spinach. Topped with a soft egg or scrambled eggs, this is a deliciously spicy weekend breakfast!
Potato, Red Pepper, Black and White Bean Hash
Yield: Serves 6
8 small red potatoes, diced into 1/2" - 3/4" bite size piece
2 red bell peppers, roughly chopped
1 large yellow onion, roughly chopped
3/4 cup cooked black beans, or 1/2 can drained
3/4 cup cooked white beans, or 1/2 can drained
3-4 cups baby spinach
Eggs, 1 per person, cooked to preference
kosher salt, to taste
freshly ground black pepper, to taste
2 tablespoons bacon grease, if available, butter or olive oil will work as well
1-2 tablespoons olive oil
Mexican Spice blend, to taste, Taco Seasoning would work also
Preheat oven to 425 degrees. In a large bowl, drizzle the potatoes with 1-2 tablespoons olive oil, enough to coat all the pieces. Sprinkle generously with the Mexican spices, I used at least a tablespoon and ours were pretty spicy. Spread the potatoes across 2 large baking sheets lined with silpat mats or greased with oil. Bake until the potatoes are tender and slightly crispy on the outside. This took about 30 minutes for me, it will vary depending on the number of potatoes.
While the potatoes are roasting, chop the peppers and onions. Warm the grease in a very large skillet over medium high heat. Add the bell peppers and onions to the oil and saute stirring constantly until slightly tender and still crisp, about 5 minutes. Season the vegetables generously with salt and pepper while cooking.
Add the beans and about a tablespoon of Mexican seasoning. Stir well and reduce the heat to medium. Continue cooking to heat the beans for just a few minutes. Add the cooked potatoes and toss to combine. Add the spinach, tossing again until the spinach is barely wilted. Remove from the heat.
Cook the eggs as desired and serve an egg on top of the warm hash for each person. Enjoy!

Click here for printable recipe
ONE YEAR AGO TODAY: Lemon Orzo with Snap Peas and Zucchini
Red potatoes seasoned with Mexican spices are roasted and then tossed with sauteed onions, peppers, black and white beans along with a handful of barely wilted warm spinach. Topped with a soft egg or scrambled eggs, this is a deliciously spicy weekend breakfast!Potato, Red Pepper, Black and White Bean Hash
Yield: Serves 6
8 small red potatoes, diced into 1/2" - 3/4" bite size piece
2 red bell peppers, roughly chopped
1 large yellow onion, roughly chopped
3/4 cup cooked black beans, or 1/2 can drained
3/4 cup cooked white beans, or 1/2 can drained
3-4 cups baby spinach
Eggs, 1 per person, cooked to preference
kosher salt, to taste
freshly ground black pepper, to taste
2 tablespoons bacon grease, if available, butter or olive oil will work as well
1-2 tablespoons olive oil
Mexican Spice blend, to taste, Taco Seasoning would work also
Preheat oven to 425 degrees. In a large bowl, drizzle the potatoes with 1-2 tablespoons olive oil, enough to coat all the pieces. Sprinkle generously with the Mexican spices, I used at least a tablespoon and ours were pretty spicy. Spread the potatoes across 2 large baking sheets lined with silpat mats or greased with oil. Bake until the potatoes are tender and slightly crispy on the outside. This took about 30 minutes for me, it will vary depending on the number of potatoes.
While the potatoes are roasting, chop the peppers and onions. Warm the grease in a very large skillet over medium high heat. Add the bell peppers and onions to the oil and saute stirring constantly until slightly tender and still crisp, about 5 minutes. Season the vegetables generously with salt and pepper while cooking.
Add the beans and about a tablespoon of Mexican seasoning. Stir well and reduce the heat to medium. Continue cooking to heat the beans for just a few minutes. Add the cooked potatoes and toss to combine. Add the spinach, tossing again until the spinach is barely wilted. Remove from the heat.
Cook the eggs as desired and serve an egg on top of the warm hash for each person. Enjoy!
Click here for printable recipe
ONE YEAR AGO TODAY: Lemon Orzo with Snap Peas and Zucchini
Family Camping Trip
To contact us Click HERE
My family has been getting together for our annual camping trip at Woods Canyon Lake every summer for over 20 years now. My mom very happily makes the following year's reservation when we leave each year. We've grown from the original group of about a dozen people to a much larger group of siblings, spouses, children, grandchildren and even more family members when we are lucky enough to have them. There were 30 of us this year (plus 8 dogs) and it was a fantastic weekend.
The escape from the heat of the valley is reason enough for most of us to look forward to the trip. Adding in volleyball, hiking, endless hours of tabletop games, fishing, boating, creek play and more, made it a fantastic weekend. For some of my family, this is the only time we'll see each other all year. Even those of us who do not truly enjoy tent camping still look forward to this trip all year long.

I was sad to see the last of my family leave this morning. So, I am indulging myself with just a few pictures and a whole lot of great leftovers instead of cooking tonight.
As I flip through the handful of pictures I remembered to take, I realize that it really would be nice to take more than a few pics next year. We all tend to get so caught up in the fun of the trip that pictures are forgotten until we are headed home.

Have you ever attempted to get three two year olds to face the camera at the same time?! This is the only shot I have of the three of them standing in the same picture! We spent most of the weekend chasing them.

Consider yourself warned, family members. I'll be bringing a fully charged cell phone, camera and a spare camera battery next year!
ONE YEAR AGO TODAY: Cinnamon Baked Oatmeal with Dried Apples and Cranberries
 |
| Helping cook oatmeal for breakfast |
My family has been getting together for our annual camping trip at Woods Canyon Lake every summer for over 20 years now. My mom very happily makes the following year's reservation when we leave each year. We've grown from the original group of about a dozen people to a much larger group of siblings, spouses, children, grandchildren and even more family members when we are lucky enough to have them. There were 30 of us this year (plus 8 dogs) and it was a fantastic weekend.
 |
| A few of my awesome sisters - great sports for a picture on Day 3 |
The escape from the heat of the valley is reason enough for most of us to look forward to the trip. Adding in volleyball, hiking, endless hours of tabletop games, fishing, boating, creek play and more, made it a fantastic weekend. For some of my family, this is the only time we'll see each other all year. Even those of us who do not truly enjoy tent camping still look forward to this trip all year long.
I was sad to see the last of my family leave this morning. So, I am indulging myself with just a few pictures and a whole lot of great leftovers instead of cooking tonight.
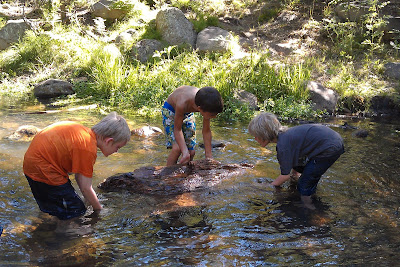 |
| Cousins working hard to relocate an enormous log from the creek. |
As I flip through the handful of pictures I remembered to take, I realize that it really would be nice to take more than a few pics next year. We all tend to get so caught up in the fun of the trip that pictures are forgotten until we are headed home.
Have you ever attempted to get three two year olds to face the camera at the same time?! This is the only shot I have of the three of them standing in the same picture! We spent most of the weekend chasing them.
Consider yourself warned, family members. I'll be bringing a fully charged cell phone, camera and a spare camera battery next year!
 | |
| Everything tastes better when eating outdoors! |
ONE YEAR AGO TODAY: Cinnamon Baked Oatmeal with Dried Apples and Cranberries
Camping Meals
To contact us Click HERE
When my extended family goes camping, we typically share our meals family-style, taking turns with making the breakfasts and dinners throughout the long weekend. This way, each family is only responsible for a single meal for the group of 30+ people.
We have always been responsible for our own lunches though. This year, because one of my sons has a recent sensitivity to wheat, I needed to think beyond the usual sandwiches. I decided to try something new and I packed regular meals instead of sandwich makings. This was the best idea I've had in a long time!

A few days before our trip, I made our absolute favorite Chicken and Bacon Stir Fry; let it cool, bagged the entire meal in a gallon size ziploc and then froze it. I also made enough rice for my family to eat with it, let the rice cool and froze it in it's own gallon size ziploc. When I was packing the coolers, I simply placed the frozen meal into the cooler, where it stayed almost frozen until we were ready to eat it. (As an added benefit, my cooler stayed much colder than when we use ice alone.)
When we were ready to warm the meal, I placed the very cold and barely thawed meal into a large skillet and warmed it over low heat on the camp stove, stirring it while it heated. Same procedure for the rice, although I added a bit of water to the rice as it was heating. It tasted absolutely delicious and we all agreed that it was about the best camp meal we could imagine.

Italian Black Bean and Spinach Soup is one of my family favorites as well and it reheats beautifully from frozen. I wait for it to cool completely and then freeze it flat in a gallon size ziploc. Pack the frozen meal and when ready to eat, let it thaw enough to break it up into a soup pot on the camp stove. It reheats perfectly every time. We also took the Chicken White Bean and Green Chile Corn Chowder that I posted last week. Same method for freezing and reheating as well.

Breakfast Potatoes were delicious alongside simple scrambled eggs and they took me almost no time to prep before the trip. I simply roasted them while the oven was on for a different meal and then let them cool. Placed them in a plastic container (to avoid a ziploc being smashed) and then refrigerated until we were packing the coolers. When ready to use them, I simply warmed them in a large skillet with a bit of butter until they were hot and crisped on the edges.

Snack foods are a requirement when sitting around playing table games during the day and into the nights. I prepped a whole lot of vegetables and we packed them in snack size bags. Along with a few containers of our current favorite Chipotle Dip and Classic Ranch Dip, it was a great addition to the chips that we enjoyed as well.
For the past few years, in lieu of preparing a breakfast or dinner for the entire group, my family has voted that I should bring plenty of desserts along to share at night. 6 varieties of cookies and 4 other desserts later, I packed an almost absurd amount of treats for our camping trip. Because of all that baking, I'll be posting a handful of new cookie and bar recipes over the next few days. (Gluten Free and Regular versions will be included for all of them.)
ONE YEAR AGO TODAY: Dark Chocolate Coconut Blondies
We have always been responsible for our own lunches though. This year, because one of my sons has a recent sensitivity to wheat, I needed to think beyond the usual sandwiches. I decided to try something new and I packed regular meals instead of sandwich makings. This was the best idea I've had in a long time!
A few days before our trip, I made our absolute favorite Chicken and Bacon Stir Fry; let it cool, bagged the entire meal in a gallon size ziploc and then froze it. I also made enough rice for my family to eat with it, let the rice cool and froze it in it's own gallon size ziploc. When I was packing the coolers, I simply placed the frozen meal into the cooler, where it stayed almost frozen until we were ready to eat it. (As an added benefit, my cooler stayed much colder than when we use ice alone.)
When we were ready to warm the meal, I placed the very cold and barely thawed meal into a large skillet and warmed it over low heat on the camp stove, stirring it while it heated. Same procedure for the rice, although I added a bit of water to the rice as it was heating. It tasted absolutely delicious and we all agreed that it was about the best camp meal we could imagine.
Italian Black Bean and Spinach Soup is one of my family favorites as well and it reheats beautifully from frozen. I wait for it to cool completely and then freeze it flat in a gallon size ziploc. Pack the frozen meal and when ready to eat, let it thaw enough to break it up into a soup pot on the camp stove. It reheats perfectly every time. We also took the Chicken White Bean and Green Chile Corn Chowder that I posted last week. Same method for freezing and reheating as well.
Breakfast Potatoes were delicious alongside simple scrambled eggs and they took me almost no time to prep before the trip. I simply roasted them while the oven was on for a different meal and then let them cool. Placed them in a plastic container (to avoid a ziploc being smashed) and then refrigerated until we were packing the coolers. When ready to use them, I simply warmed them in a large skillet with a bit of butter until they were hot and crisped on the edges.
Snack foods are a requirement when sitting around playing table games during the day and into the nights. I prepped a whole lot of vegetables and we packed them in snack size bags. Along with a few containers of our current favorite Chipotle Dip and Classic Ranch Dip, it was a great addition to the chips that we enjoyed as well.
For the past few years, in lieu of preparing a breakfast or dinner for the entire group, my family has voted that I should bring plenty of desserts along to share at night. 6 varieties of cookies and 4 other desserts later, I packed an almost absurd amount of treats for our camping trip. Because of all that baking, I'll be posting a handful of new cookie and bar recipes over the next few days. (Gluten Free and Regular versions will be included for all of them.)
ONE YEAR AGO TODAY: Dark Chocolate Coconut Blondies
Coconut Chews - Gluten Free or Not
To contact us Click HERE
 Chewy coconut filling layered onto a buttery shortbread crust; this recipe is so simple to make I have been making it since I was a child. This is my grandmother's recipe and if you are a coconut purist, these can not be beat. I hadn't made these bars in years and when I baked this GF version and took them to some friends and family they were an enormous hit.
Coconut Chews - Gluten Free or Not
Crust Ingredients:
1/2 cup butter, softened
1/2 cup sugar
2/3 brown rice flour *
1/3 cup potato starch *
Filling Ingredients:
2 eggs
1 teaspoon vanilla
1/2 cup light brown sugar
2 tablespoons brown rice flour *
1 cup shredded coconut
* If you do not need a gluten free version, substitute 1 cup AP flour in the crust and 2 tablespoons AP flour in the filling for the items marked with an *.
Preheat the oven to 350 degrees. Combine the crust ingredients and press into the bottom of a buttered 8x8 pan or line the pan with parchment paper. (Doubling this recipe will perfectly fill a 9x13 pan.) Bake for 10 minutes, (15 minutes for a doubled recipe) remove from oven and let cool while finishing the rest of the recipe.
Mix together the filling ingredients and pour over the crust. Bake 20 minutes more (25 minutes for the doubled recipe). Let cool completely before slicing. Enjoy!
 Click here for printable recipe
ONE YEAR AGO TODAY: Oatmeal Butterscotch Bars
Chewy coconut filling layered onto a buttery shortbread crust; this recipe is so simple to make I have been making it since I was a child. This is my grandmother's recipe and if you are a coconut purist, these can not be beat. I hadn't made these bars in years and when I baked this GF version and took them to some friends and family they were an enormous hit.Coconut Chews - Gluten Free or Not
Crust Ingredients:
1/2 cup butter, softened
1/2 cup sugar
2/3 brown rice flour *
1/3 cup potato starch *
Filling Ingredients:
2 eggs
1 teaspoon vanilla
1/2 cup light brown sugar
2 tablespoons brown rice flour *
1 cup shredded coconut
* If you do not need a gluten free version, substitute 1 cup AP flour in the crust and 2 tablespoons AP flour in the filling for the items marked with an *.
Preheat the oven to 350 degrees. Combine the crust ingredients and press into the bottom of a buttered 8x8 pan or line the pan with parchment paper. (Doubling this recipe will perfectly fill a 9x13 pan.) Bake for 10 minutes, (15 minutes for a doubled recipe) remove from oven and let cool while finishing the rest of the recipe.
Mix together the filling ingredients and pour over the crust. Bake 20 minutes more (25 minutes for the doubled recipe). Let cool completely before slicing. Enjoy!
Click here for printable recipeONE YEAR AGO TODAY: Oatmeal Butterscotch Bars
7 Temmuz 2012 Cumartesi
turnips...really?
To contact us Click HERE
how often do you eat turnips? be honest. turnips are just not a vegetable most people think about. or talk about. or plan menus around. so when food network selected them to be featured this week on food fest i was less than thrilled. i mean i like them (i really do). but how many ways can you prepare them? mashed? check. roasted? check. in soups and stews? check. steamed and then baked in a casserole? raw in a salad? all delicious....but, frankly, been there done that...many, many times. then i realized the beauty of fall fest. i am not just a contributer. i am a fan and i get to try all the wonderful, creative recipes my fellow bloggers will share.
good thing because turnips are a healthily addition to our diet. according to rawdiet.com:
"The Turnip holds a great number of nutritional benefits. It is highly rich in calcium, magnesium, folic acid and phosphor and thus essential for a healthy body. Turnips have low calories and no fat. A cup of turnips contain 36 calories. Thus regular consumption does not affect the physique. Turnips have high level of vitamin C and thus protect the body against free radicals. The anti-oxidant properties of turnips help in removing harsh oxidation reactions." cont. on the raw diet website

last year, i shared my recipe for pan fried turnips in olive oil served with italian sausage and padrone peppers...so very good. today, i am going with roasted root vegetable casserole, a mix of sweet potatoes, carrots, parsnips and turnips; roasted and then topped with a garlicky bread crumb topping. the vegetables are roasted until caramelized making them very sweet. the topping adds crunch and a big garlic punch. perfect with roasts, chicken, the thanksgiving turkey. i sometimes add a couple of poached eggs and serve for brunch. i love this dish! try both of these recipes and those of my fellow bloggers...they just might change your opinion of turnips.

roasted root vegetable casserole
(as always, use local organic/sustainably grown ingredients if you can...the dish will taste better and be better for you)
4 carrots
3 sweet potatoes
4 turnips
4 parsnips
1/2 red onion
extra virgin olive oil
sea salt
aged balsamic vinegar
freshly cracked black pepper
1 1/2 cups fresh bread crumbs from french or sourdough bread
2 cloves garlic, minced
preheat oven to 400 degrees. chop each vegetable into cubes approx 2 inches each and add to a rimmed baking sheet. drizzle with olive oil (about 3 tbsp). using your hands, roll the vegetables in the oil until each piece is coated. sprinkle with sea salt and pepper. roast in oven 15 minutes. remove from oven, stir and place back in oven for an additional 20-25 minutes or until vegetables are tender and caramelized. reduce oven heat to 350 degrees.
pour vegetables and the olive oil from the pan into a casserole dish. drizzle 2 tbsp balsamic vinegar over top of vegetables. sprinkle prepared bread crumbs (see recipe below) over vegetables. place casserole in oven for 15-20 minutes, or until hot. serve immediately.
garlicky bread crumbs
add 1 tbsp extra virgin olive oil to a small skillet over medium heat. add the minced garlic and sauté for 1 minute. add the bread crumbs and an additional tbsp olive oil. stir until crumbs are coated with the oil. sauté mixture, stirring frequently, until golden brown. remove from heat.


now it is your turn to participate in fall fest. simply leave your turnips tip or recipe or favorite links in the comments below, and then go visit food network and do the same same. join the conversation on twitter at #cookingwith and be sure to check out these delicious sounding recipes from the other participating bloggers:
The Sensitive Epicure: Roasted Turnips With Olive Oil and Rosemary
Virtually Homemade: Turnip Gratin With Parmesan and Nutmeg
And Love It Too: Turnip Pancakes
Purple Cook: Vegetable Biryani With Turnips
Glory Foods: Turnip Greens With Potatoes and Mushrooms
Big Girls Small Kitchen: Creamed Turnips With Their Greens
FN Dish: Simply Roasted Turnips
best,
diane
diane padoven
founder/president
napa farmhouse 1885
"live a green life of style™ "
do you like us? really like us? then please join our facebook fan page

to receive special offers only available to our preferred customers, please sign up for the mailing list on the right hand side of this post.
 |
| courtesy rawdiet.com |
good thing because turnips are a healthily addition to our diet. according to rawdiet.com:
"The Turnip holds a great number of nutritional benefits. It is highly rich in calcium, magnesium, folic acid and phosphor and thus essential for a healthy body. Turnips have low calories and no fat. A cup of turnips contain 36 calories. Thus regular consumption does not affect the physique. Turnips have high level of vitamin C and thus protect the body against free radicals. The anti-oxidant properties of turnips help in removing harsh oxidation reactions." cont. on the raw diet website
last year, i shared my recipe for pan fried turnips in olive oil served with italian sausage and padrone peppers...so very good. today, i am going with roasted root vegetable casserole, a mix of sweet potatoes, carrots, parsnips and turnips; roasted and then topped with a garlicky bread crumb topping. the vegetables are roasted until caramelized making them very sweet. the topping adds crunch and a big garlic punch. perfect with roasts, chicken, the thanksgiving turkey. i sometimes add a couple of poached eggs and serve for brunch. i love this dish! try both of these recipes and those of my fellow bloggers...they just might change your opinion of turnips.
roasted root vegetable casserole
(as always, use local organic/sustainably grown ingredients if you can...the dish will taste better and be better for you)
4 carrots
3 sweet potatoes
4 turnips
4 parsnips
1/2 red onion
extra virgin olive oil
sea salt
aged balsamic vinegar
freshly cracked black pepper
1 1/2 cups fresh bread crumbs from french or sourdough bread
2 cloves garlic, minced
preheat oven to 400 degrees. chop each vegetable into cubes approx 2 inches each and add to a rimmed baking sheet. drizzle with olive oil (about 3 tbsp). using your hands, roll the vegetables in the oil until each piece is coated. sprinkle with sea salt and pepper. roast in oven 15 minutes. remove from oven, stir and place back in oven for an additional 20-25 minutes or until vegetables are tender and caramelized. reduce oven heat to 350 degrees.
pour vegetables and the olive oil from the pan into a casserole dish. drizzle 2 tbsp balsamic vinegar over top of vegetables. sprinkle prepared bread crumbs (see recipe below) over vegetables. place casserole in oven for 15-20 minutes, or until hot. serve immediately.
garlicky bread crumbs
add 1 tbsp extra virgin olive oil to a small skillet over medium heat. add the minced garlic and sauté for 1 minute. add the bread crumbs and an additional tbsp olive oil. stir until crumbs are coated with the oil. sauté mixture, stirring frequently, until golden brown. remove from heat.
now it is your turn to participate in fall fest. simply leave your turnips tip or recipe or favorite links in the comments below, and then go visit food network and do the same same. join the conversation on twitter at #cookingwith and be sure to check out these delicious sounding recipes from the other participating bloggers:
The Sensitive Epicure: Roasted Turnips With Olive Oil and Rosemary
Virtually Homemade: Turnip Gratin With Parmesan and Nutmeg
And Love It Too: Turnip Pancakes
Purple Cook: Vegetable Biryani With Turnips
Glory Foods: Turnip Greens With Potatoes and Mushrooms
Big Girls Small Kitchen: Creamed Turnips With Their Greens
FN Dish: Simply Roasted Turnips
best,
diane
diane padoven
founder/president
napa farmhouse 1885
"live a green life of style™ "
do you like us? really like us? then please join our facebook fan page
to receive special offers only available to our preferred customers, please sign up for the mailing list on the right hand side of this post.
Kaydol:
Yorumlar (Atom)